Do I Need to Put Primer on Cabneits Again
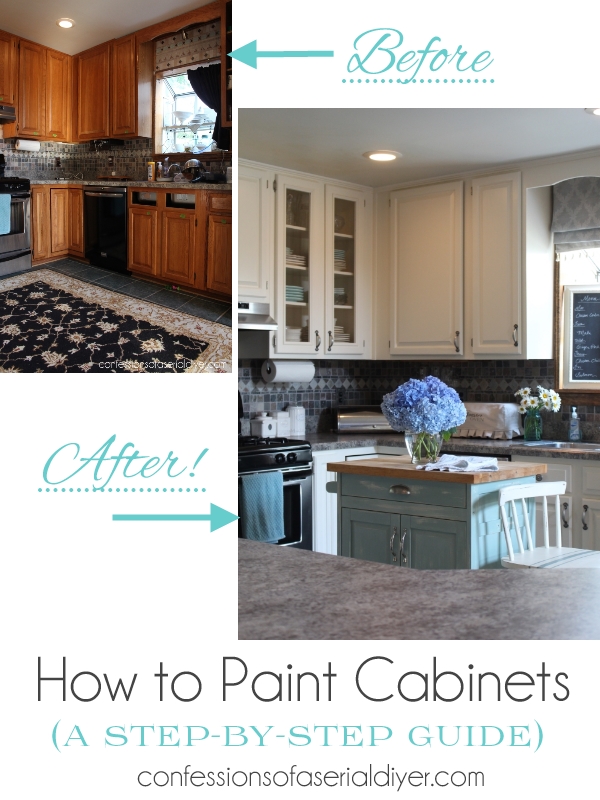
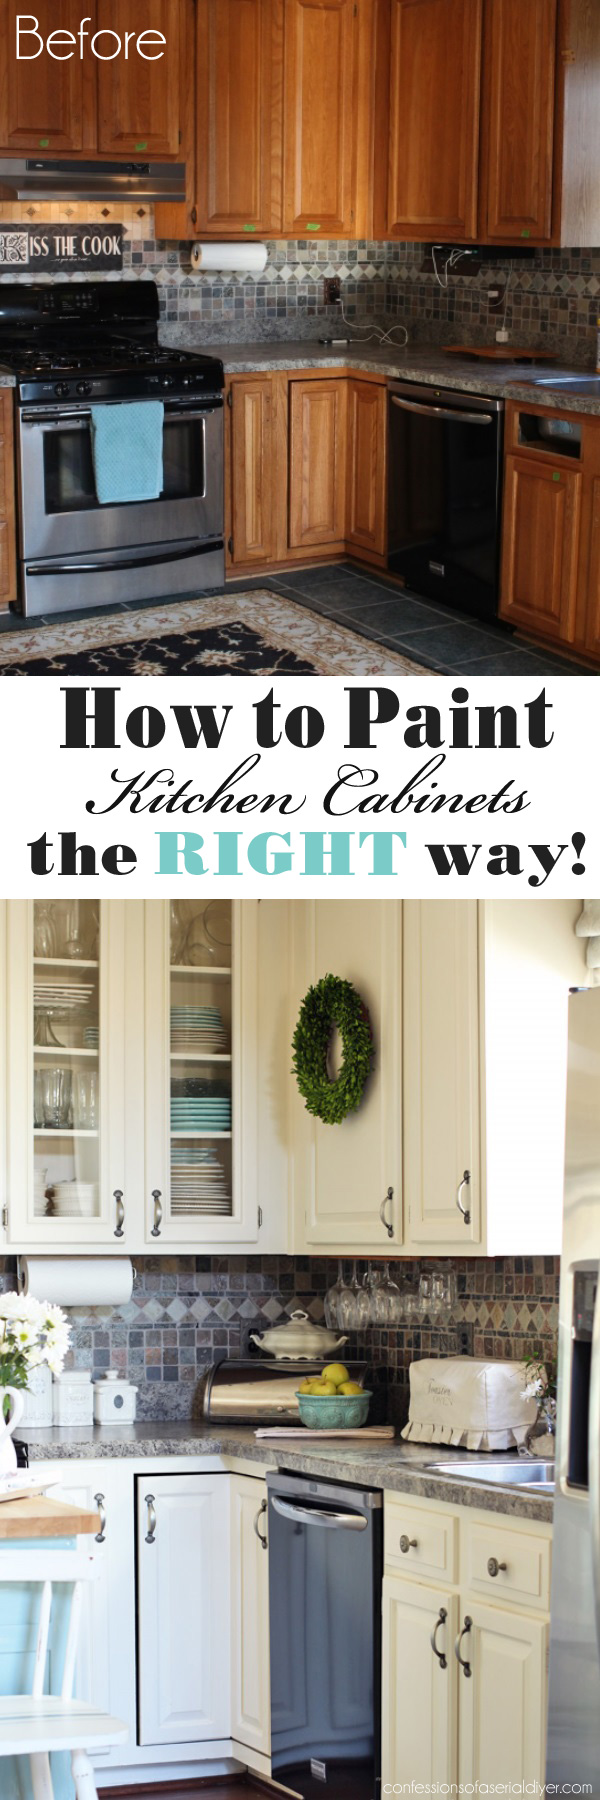
If y'all're in the market to pigment your kitchen cabinets, y'all have come to the right place! I am sharing every single solitary step to a brand new space!
While the actual priming and painting only took three days (tin y'all say marathon painting?), reviving your kitchen cabinets volition also crave at least one solid day for prep, and at least one additional day to put everything back together. I took all day Friday to prep, primed and painted Saturday, Sunday, and Monday, and put everything back together all day Tuesday for a total of five days.
I am sharing my experience step-past-stride. Feel complimentary to skim over if yous don't need that much nitty gritty. I included affiliate links then yous tin can observe the products I used. Click hither to read my full disclosure policy.
If yous missed the earlier of this makeover, you tin meet all the not and so pretty pictures Here.
Let's become started!
Day 1: Prep Cabinets
- Remove all handles and knobs, and shop them in a Ziploc bag if you plan to reuse them.
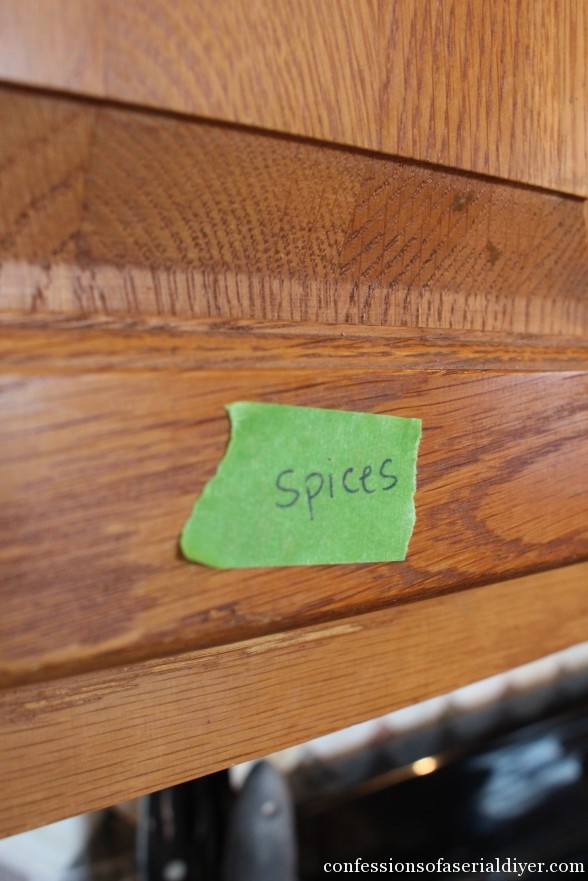
- Label doors according to what is inside. I used FrogTape
which was perfect since I was moving the tape often.
- Remove cabinet doors and cabinet door hardware (hinges). If you plan to reuse them, save them in a Ziploc purse also. (I have reused my hinges in the past to save on costs. I just spray painted the old hinges. Even so, if it is in your budget to do and so, I recommend purchasing new ones. Be sure to accept a sample of what y'all already have to the shop with you!)
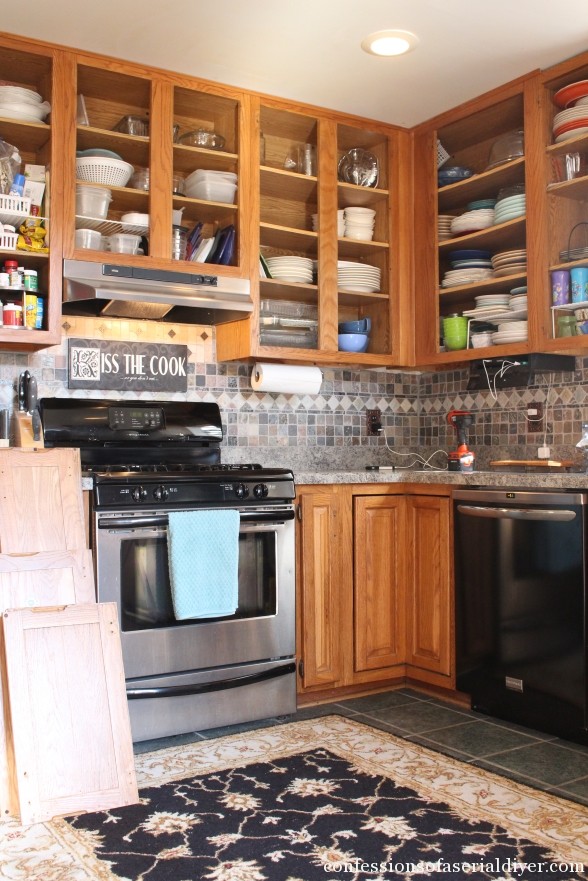
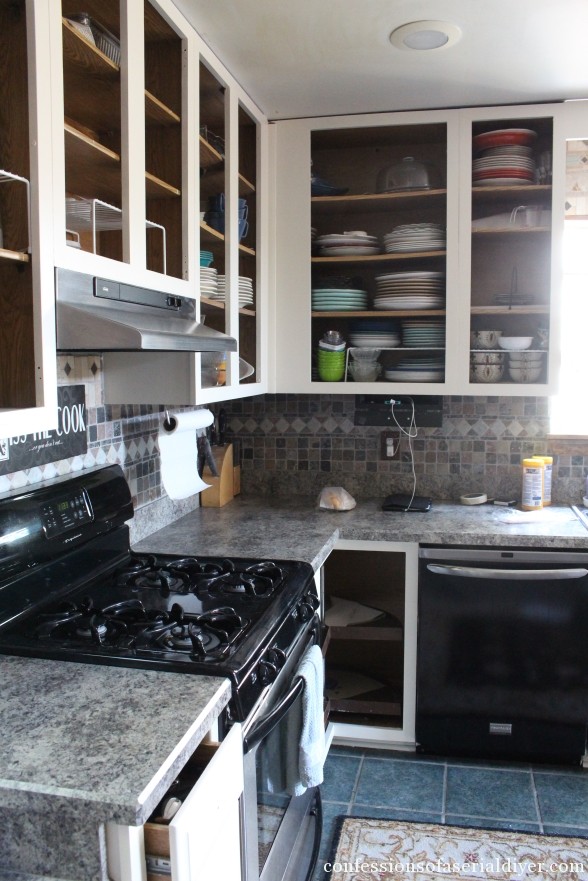
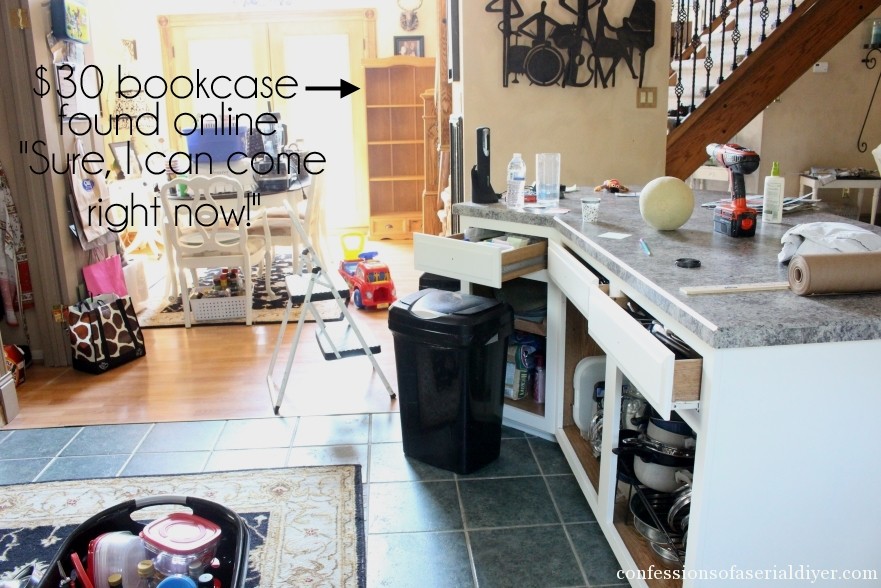
- Remove everything from the counters if possible. I emptied a couple of my cabinets, but not all. I pushed as much dorsum as I could and removed anything that was unable to exist pushed back.
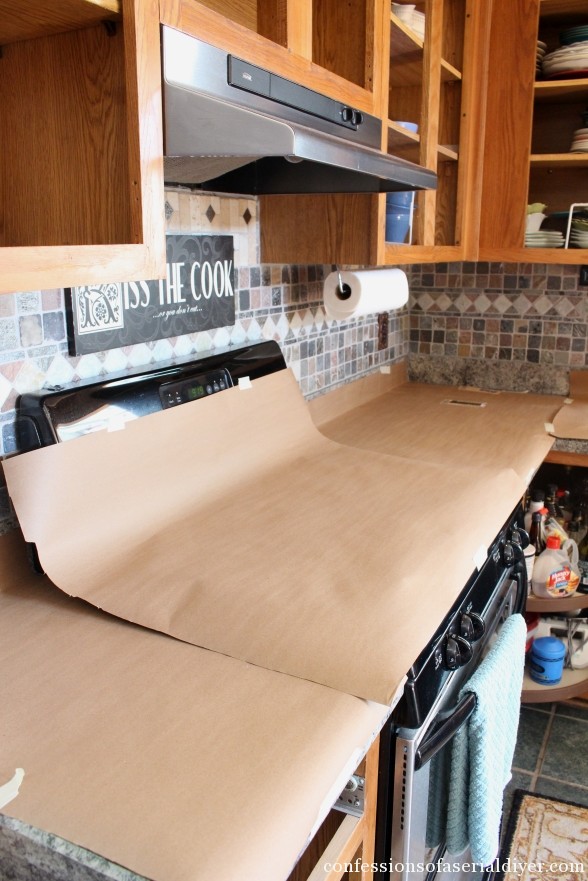
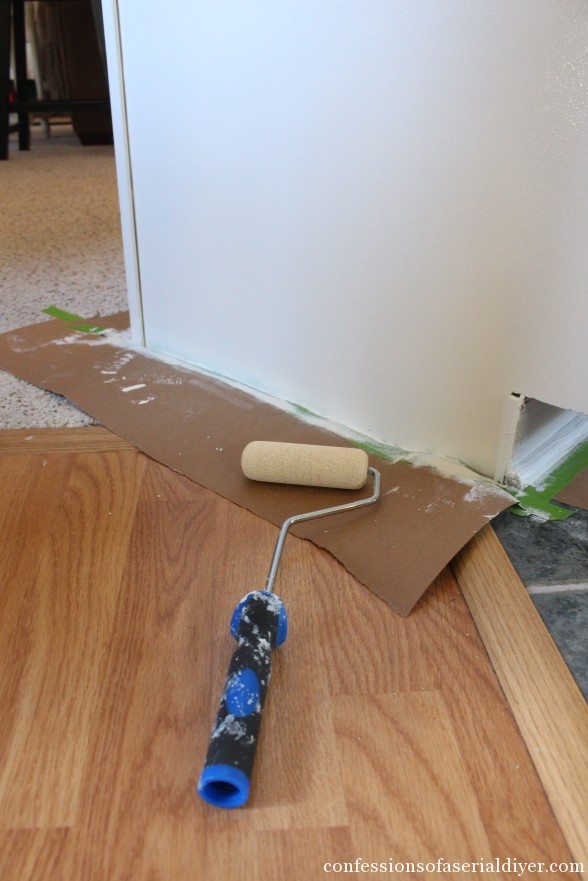
- I found it very helpful to comprehend my surfaces with dark-brown paper. A whorl of information technology can be found near the drop cloths at Lowes for around $8. It will catch whatever paint splatter and whatever dust from sanding, saving a ton of clean up later.
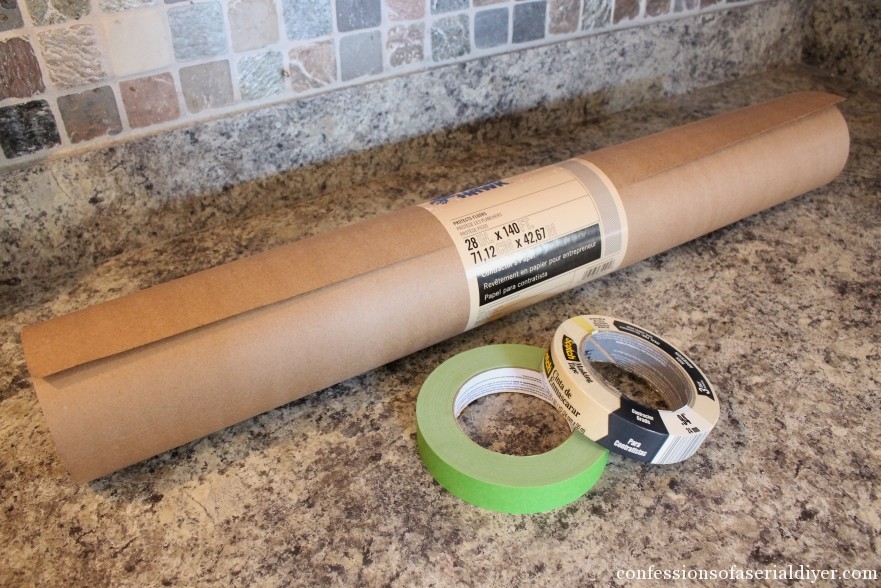
I used masking tape to concur it in place. I covered the stove and sink also, but I was able to remove it when I needed to utilize either. And then I just put information technology right back.
- The MOST IMPORTANT step for a beautiful, smooth finish is cleaning your cabinets! I used All Surface Paint Prep
which is a TSP substitute. This item brand is no longer available, but this one is merely every bit good…as long every bit it says it is also a deglosser.
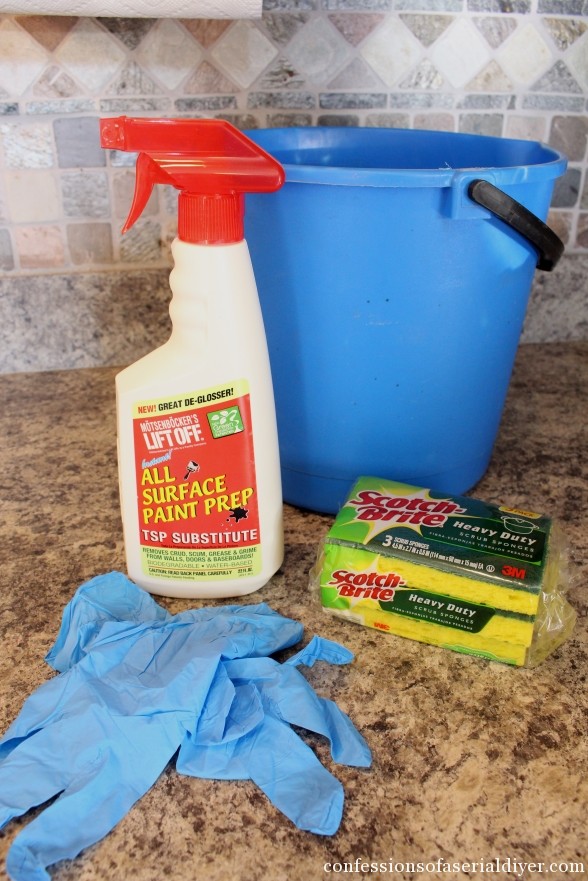
Because this product is also a deglosser, it will take the gloss off of any surface you apply it on. Wearing gloves is recommended. I sprayed it straight onto my Scotch Brite sponge and and so wiped the cabinets downwards with it. I had to utilize the abrasive side in stubborn areas. I started with my cabinet boxes.
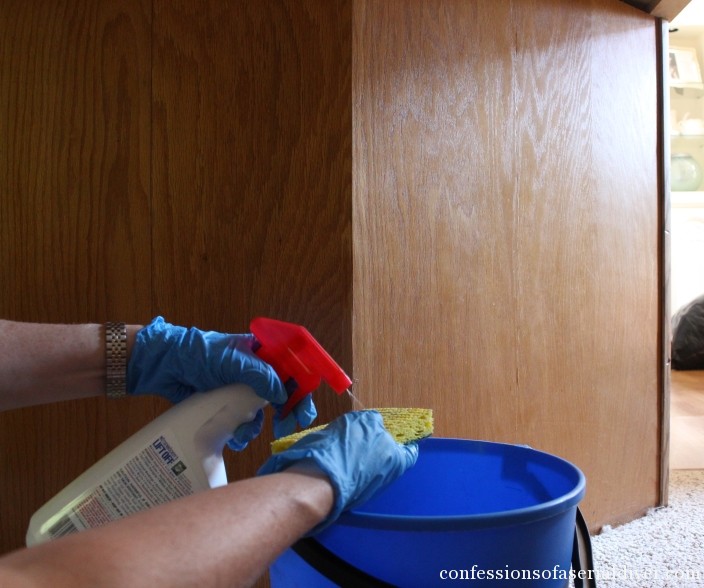
Action shot! I don't remember I've ever been photographed while cleaning before.
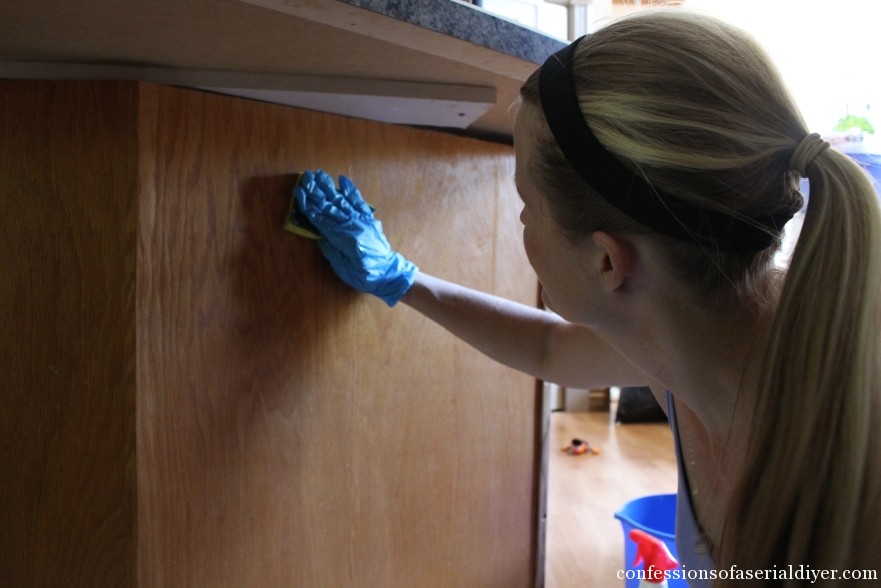
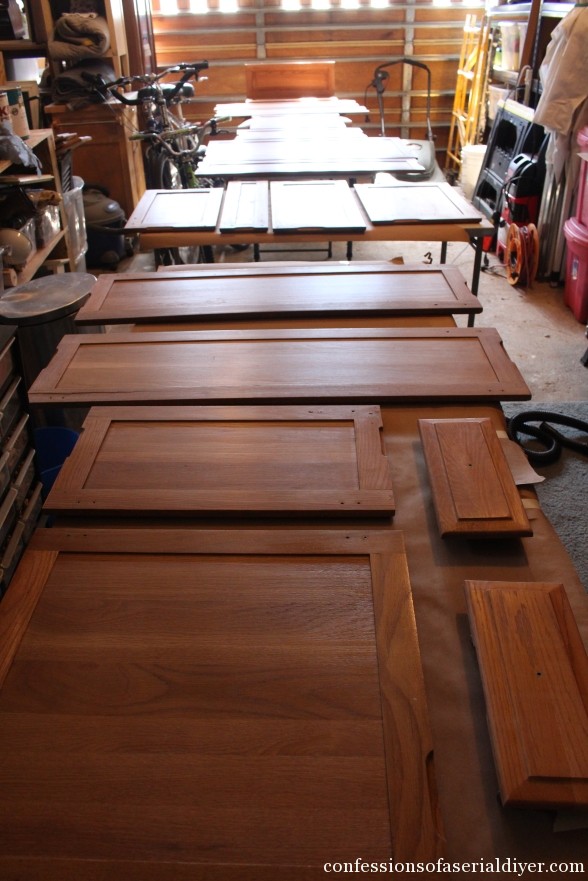
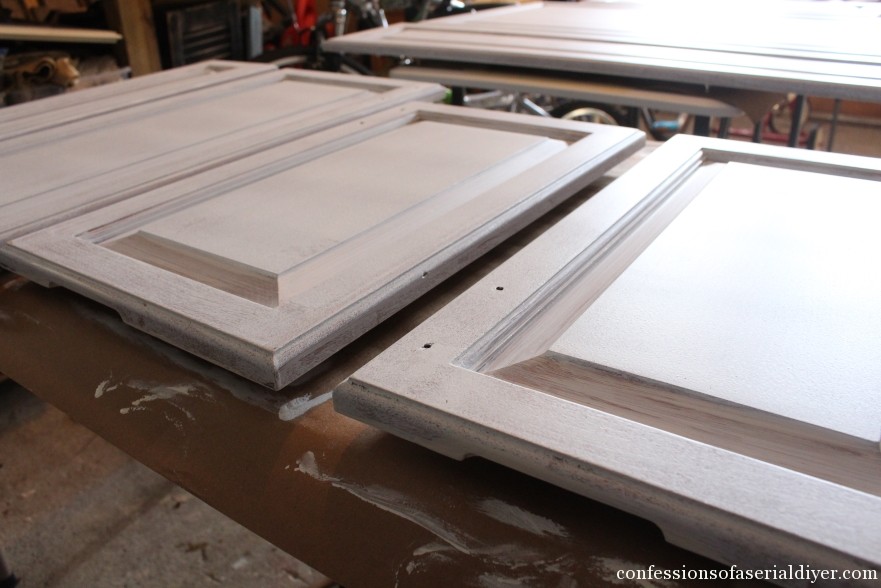
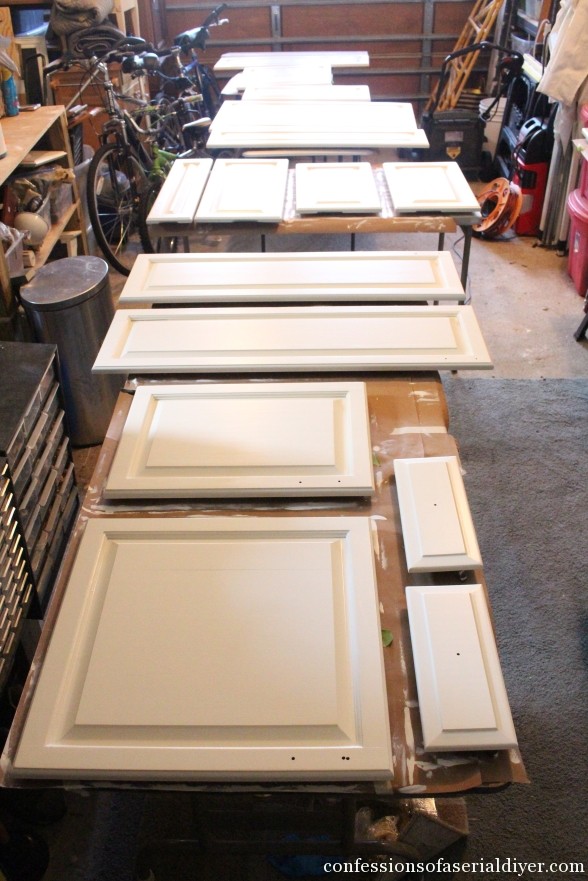
- Find a clean, grit-free area to lay out your cabinet doors. I have several tables I was able to set, simply yous could just as easily lay them out on a drop cloth on the floor. You can see I carved out a very narrow space in my crowded garage!
- Clean the cabinet doors. I was able to spray the cleaner right on to the doors this time since no other surfaces needed to be protected. Await at the difference on this tall chiffonier:
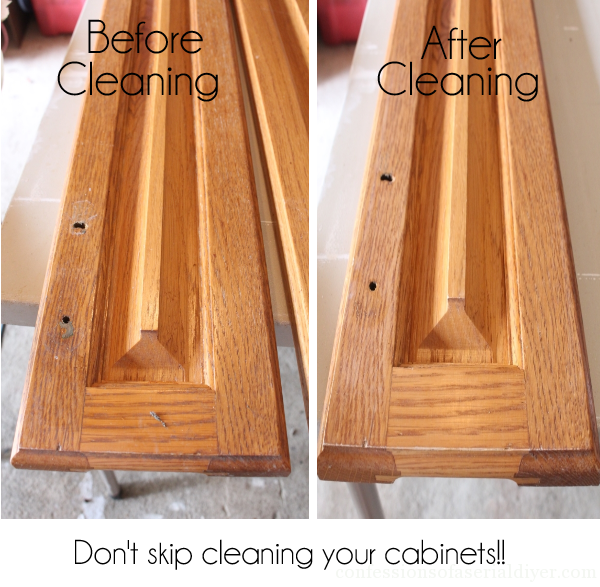
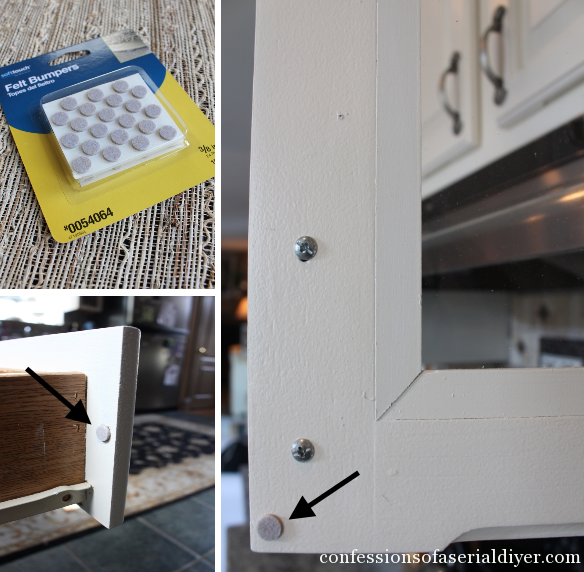
The cabinet on the right almost looks as though it's been sanded. I also scraped off the old felt bumpers with a razor blade. (I retrieve they were dry-rotted anyway.)
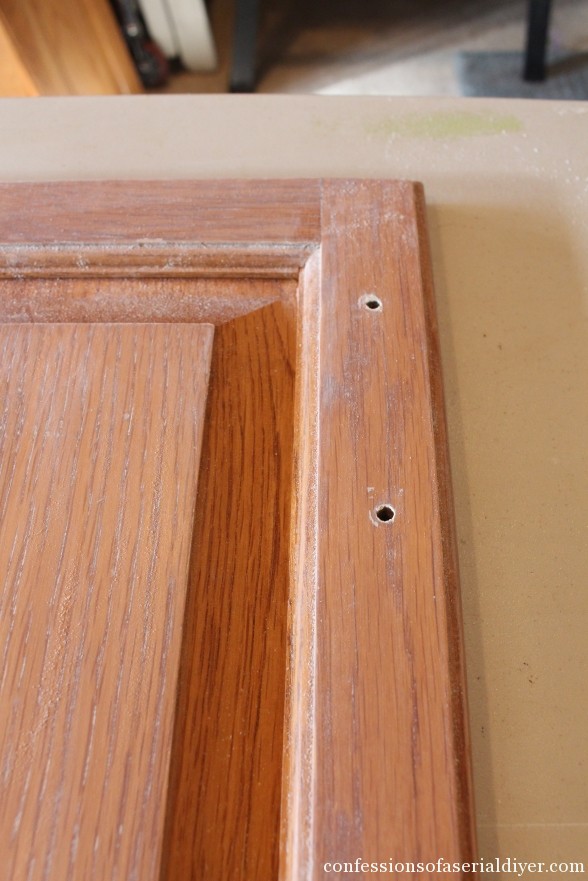
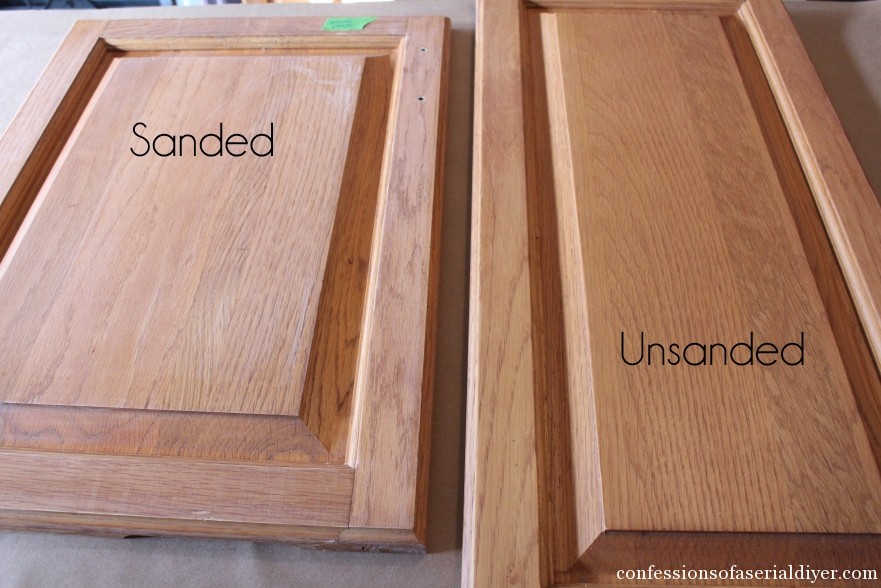
- Time to sand! Sand the cabinet boxes first. Sand all surface fronts and the lip just inside the cabinet. I did not paint the interior of the cabinets, and then no prep is needed in that location. You are not sanding down to blank wood, only enough to remove any shiny surfaces that still remain afterward cleaning. Utilise 320 grit sandpaper or a fine sanding block. I like to cutting full sheets of sandpaper into four rectangles, so wrap one around an former foam sanding cake to sand my pieces, replacing each slice of sandpaper often. *I also highly recommend wearing a dust mask while sanding!
- Sand drawer fronts and doors. When sanding drawer fronts and doors, sand really well where the knobs and pulls are or will be, as those areas volition receive the most wear.
- Use a shop vac to pick upwards the dust in the cabinets and from the crevices of the cabinet doors. Wipe off any remaining dust with a clean clammy cloth.
- Record off the hood vent, inside of drawers, appliances and anything else that needs to be protected from paint.
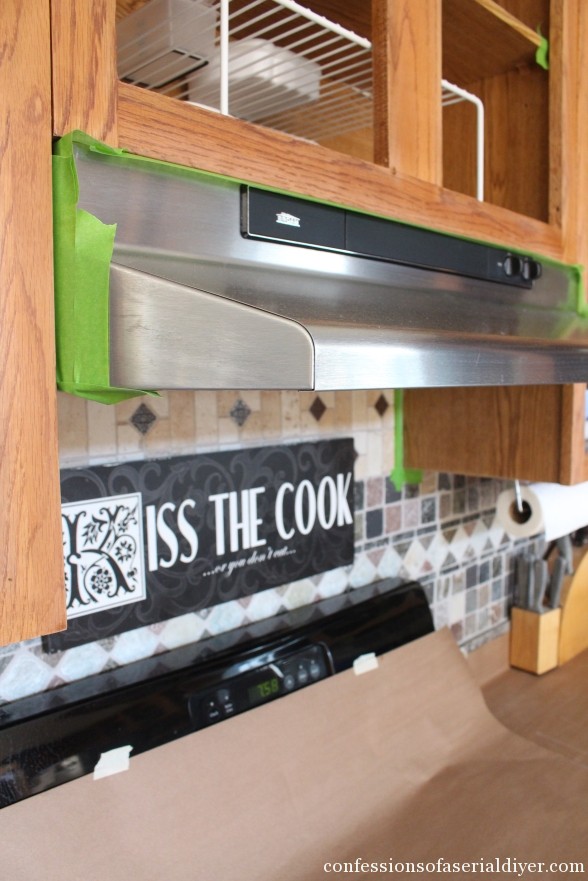
- Add near a foot of brown paper all around the base of the cabinets to catch drips and splatter. This is the simply photo I have, simply you tin can see it also provides a landing spot for your brush and roller equally you lot're switching dorsum and along.
Woo hoo! Your kitchen is officially prepped! Wasn't that hard piece of work??
Twenty-four hours 2: Time to Prime!
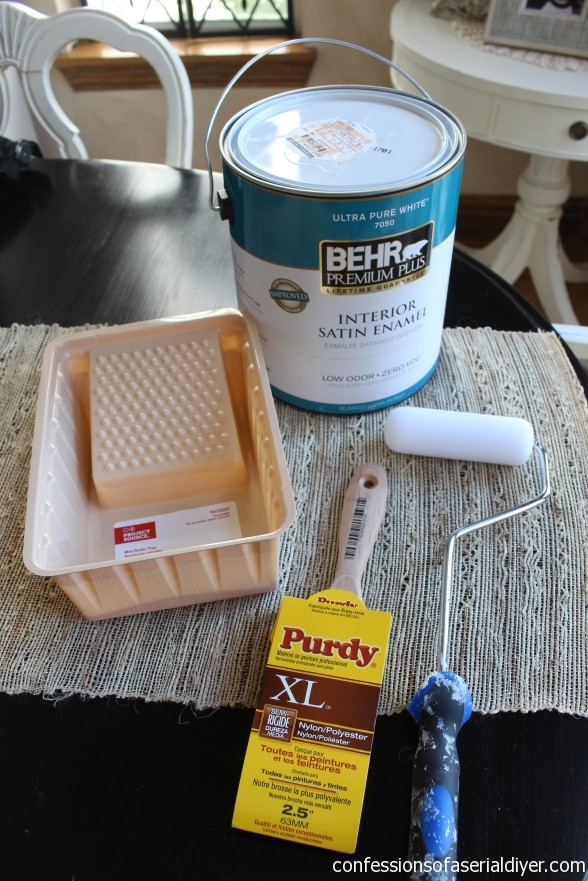
This is what you'll need to first priming:
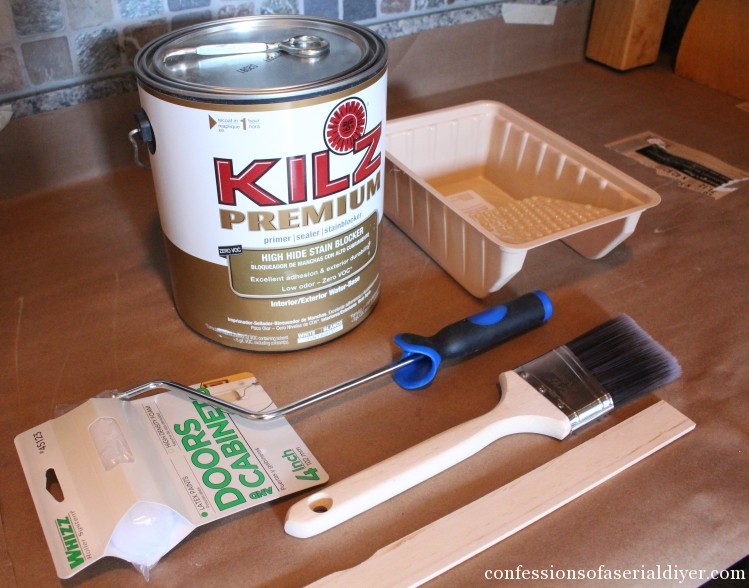
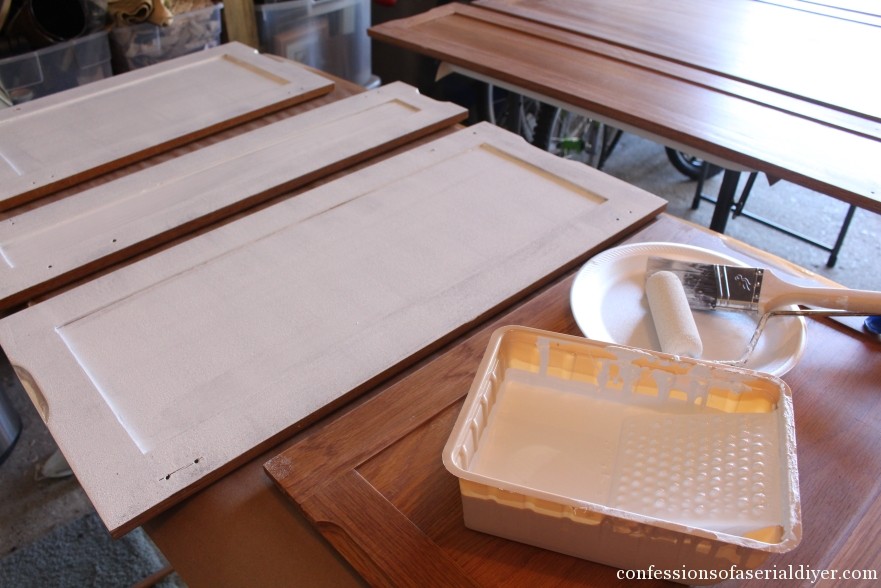
Kilz Premium Primer
Four inch roller and an additional 2-pack of smooth rollers (These are from Lowes and specified, "Doors and Cabinets".)
4-Inch Pigment Roller Tray
Paintbrush -I prefer to use a Purdy 2.5-Inch Angle Brush, merely I had this brand new brush on hand already, which is fine for priming. (I did use a Purdy for painting. )
Gloves (not shown) I bought a 25 pack of bluish Nitrile Gloves and tried to vesture them at all times to save on clean upwardly.
-
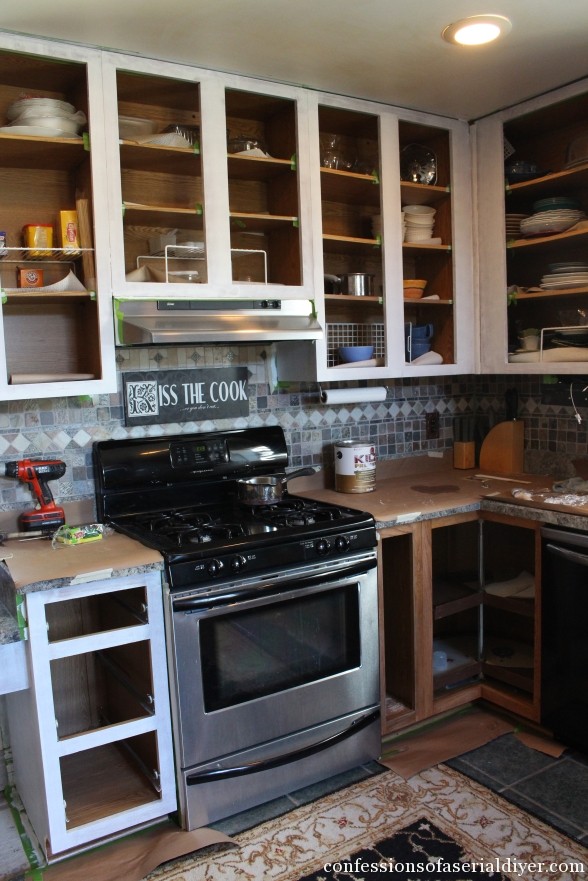
Start priming the boxes of your cabinets starting time. I painted mine much the same way yous would paint a wall. I cut in with the brush and then rolled out the easier-to-reach areas. I will warn you that when you stand back and wait at your primed cabinets you may get-go doubting the insane thought you had to paint your cabinets. They will look terrible simply accept religion. The paint volition look spectacular!
Mine looked pretty awful at this betoken:
- Prime drawer fronts. I used a paintbrush to apply primer to the back of the drawer fronts and a roller to gyre out the fronts. Do Not prime the sides of the drawers, but the fronts and behind of the fronts.
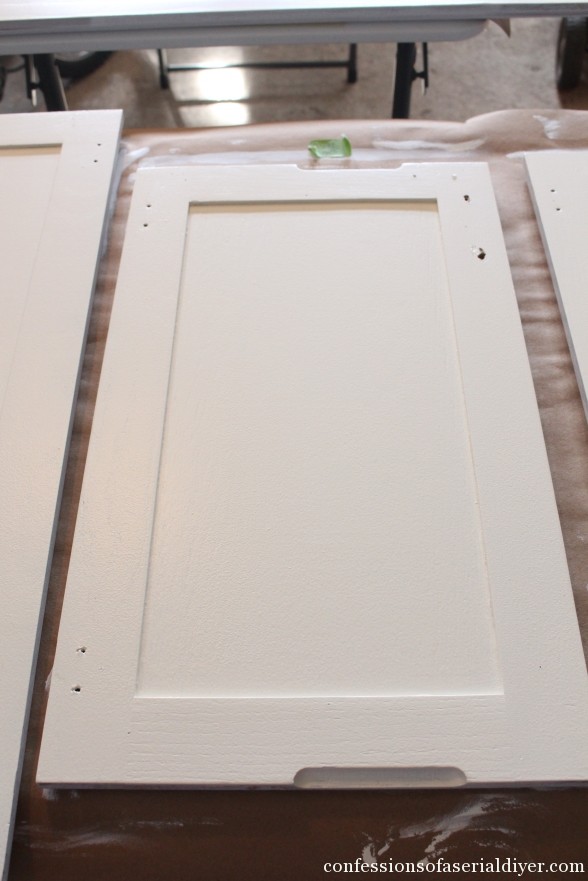
- Prime the cabinet doors. Lay all of the doors with the backsides facing upwardly. The backs should be painted first. I cut in the inside panels with the brush and rolled out the rest.
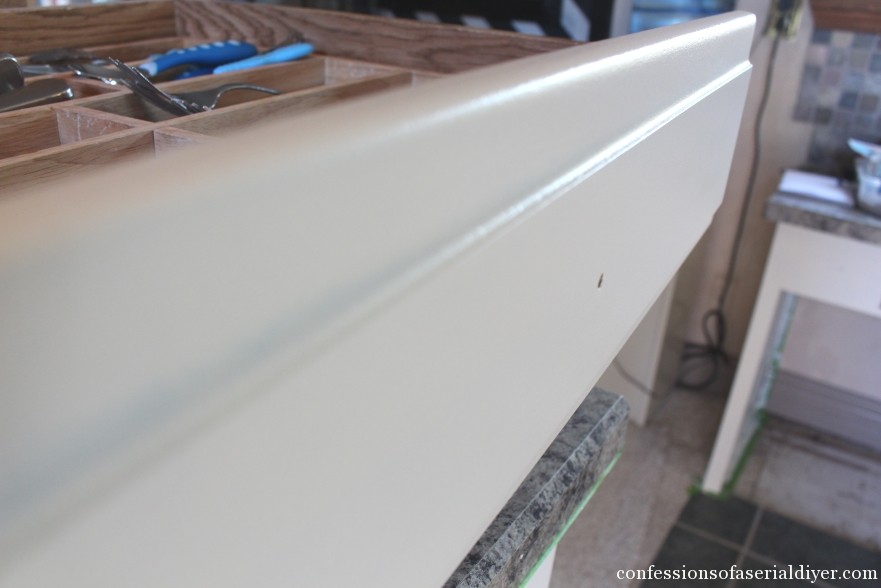
Be sure to lightly gyre the primer on at the edges, and then that the primer only covers the top surface, and doesn't baste down onto the sides:
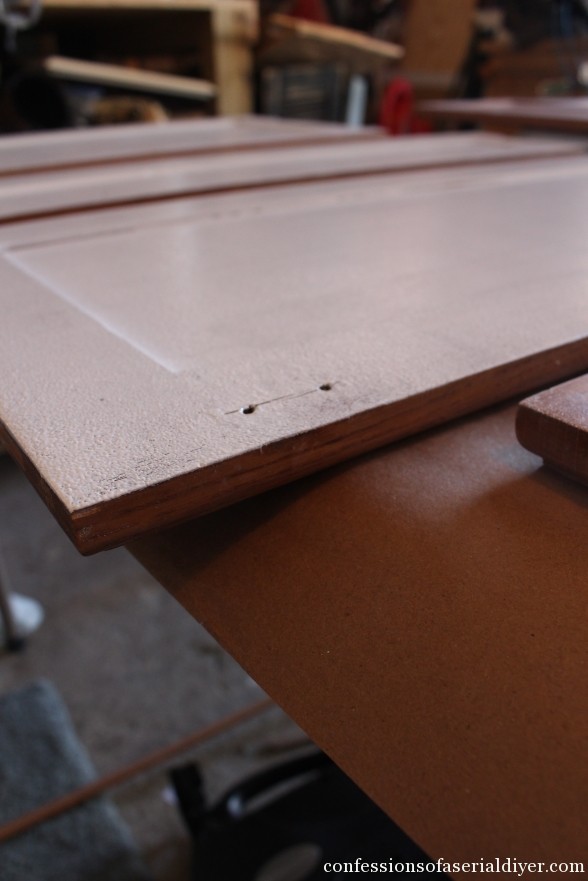
Only one coat of primer should do the trick, unless your cabinets are really night, then I would recommend post-obit upwardly with 1 more coat of primer when that first coat is dry before moving on.
- Later about 2 hours of dry fourth dimension, I primed the fronts of the cabinet doors. To do this, I found a flim-flam using button pins! Earlier flipping them over, I lightly hammered a pushpin in each corner to let the backside to continue to dry thoroughly while still being able to prime the front end!
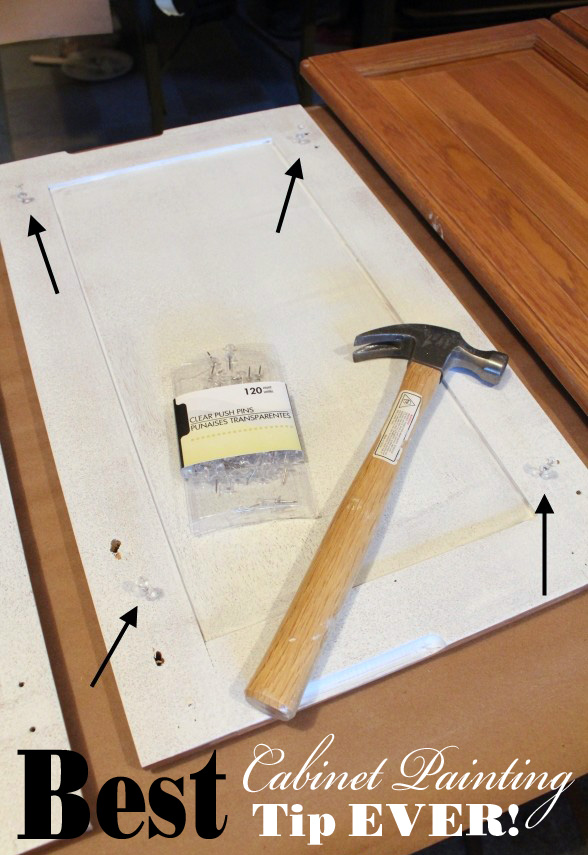
Ready for the front side now! It'south also easier to run a roller around the sides with the chiffonier doors elevated.

Did I mention I was marathon painting? Thankfully primer dries really speedily. Since my cabinet boxes inside had been dry for a few hours, I started painting! (Not the doors, merely yet, but the boxes were ready!)
Day 2 (still): Let's Start Painting!
Here'southward what you'll need to paint your cabinets:
Interior Enamel Pigment in a Satin finish (I used Behr's Cottage White) **This is latex paint, but the enamel gives information technology a durable, easy-to-clean finish.
**I did not get the paint with primer built-in since I was priming separately, only I would recommend using the paint with the primer for even amend coverage, as I did accept to bear on up a few areas.
Four-inch roller and an additional 2-pack of polish rollers (These are from Lowes and specified, "Doors and Cabinets".)
iv-Inch Paint Roller Tray
Purdy 2.5-Inch XL Brush or other practiced quality brush (2 or 2 1/ii″)
Nitrile Gloves (Again, if you tin can relieve on clean up…plus I used my fingers for clean upwardly so they were covered in paint!)
-
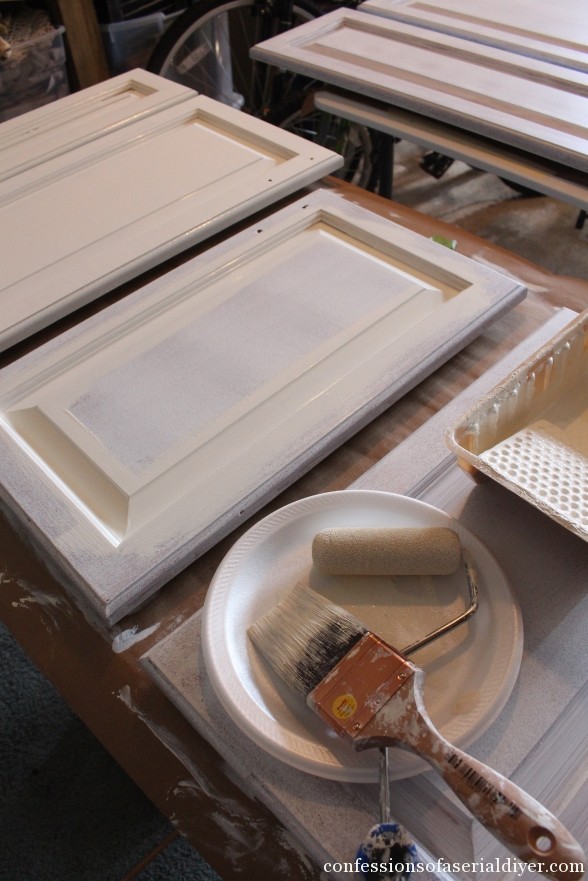
Pigment the cabinet boxes. Use the same method every bit priming, brush to cut in and gyre out the rest.
- Pigment cabinet drawer fronts. Over again, I used a paintbrush to paint the back of the drawer fronts and a roller to coil out the fronts. Practise Not paint the sides of the actual drawers. You are but painting the panels fastened to the fronts of the drawers. I also painted the backs of those forepart panels.
This photo shows how smooth and pretty the pigment is!
- Allow everything to dry overnight.
- Wrap all brushes and rollers with Saran Wrap when not in utilize. I used mine off and on for about two weeks similar this, no washing necessary in between uses.

Twenty-four hour period 3: Paint, Paint, Paint
- Time to pigment the dorsum sides of the chiffonier doors. Y'all'll need to remove the push pins from the backs and lay the fronts face down. They should be well dry after sitting overnight, so no push button pins necessary. I painted the same way, using a castor to cutting in the recessed surface area and a roller to roll information technology out.
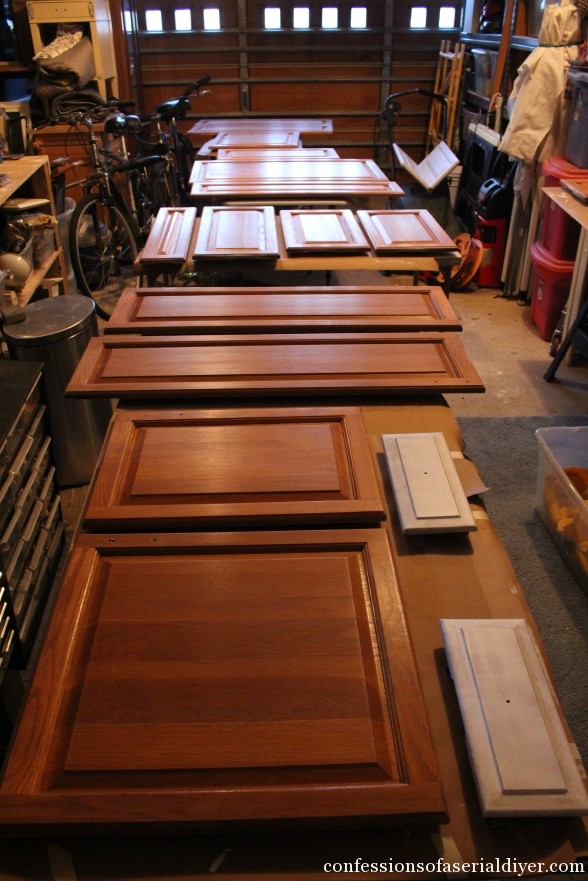
- Paint the cabinet boxes next with their 2nd coat of paint. This is when everything starts to expect really peachy!
- Remove tape while your surfaces are still wet!! This includes the brown newspaper on the floor.
- Take a suspension and take intendance of things yous've been neglecting for the past 2 days, while your paint dries. Or take your kids to the Strawberry festival and go pick upward a bookcase you plant on an online grand auction, simply had no business organization doing since y'all are knee-deep in a kitchen redo war zone.
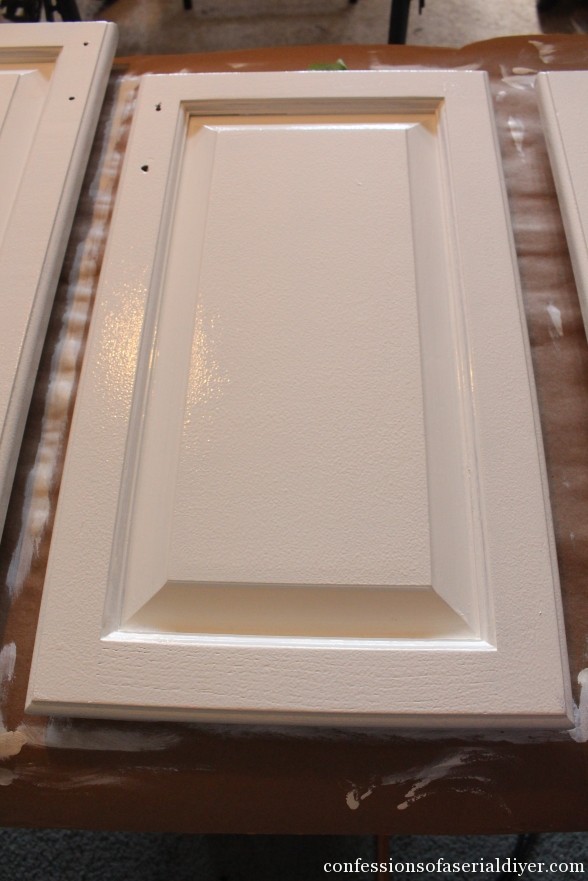
- Later on a few hours of allowing the first coat on the cabinet backs to dry, I practical the second glaze. They await and then pretty! (You can see here besides that the labels concluded up on the table in forepart of each cabinet.)
Ane glaze of primer and ii coats of paint gave perfect coverage in the rolled areas. The brushed areas, could benefit from the paint with primer added for even amend coverage.
- Allow everything to dry overnight.
Day 4: Finish Painting
- Add pushpins once over again to the backs of the cabinets.

- Plow chiffonier doors over and paint. I used a castor in the recessed areas and rolled out the flat areas and sides.
- I let mine dry out pretty much all day, then gave them a 2d glaze. The pigment dries to the touch really quickly.
- Let the fronts dry completely overnight.
Day 5: Put the Kitchen Back Together
Y'all can wake up to this and know that the painting is behind y'all!
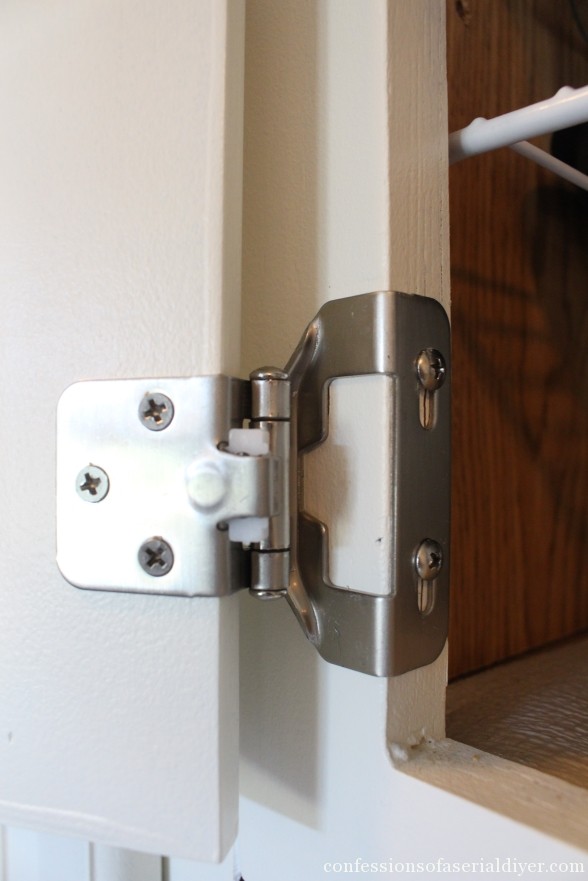
- Fourth dimension to add together hinges! I installed brand new hinges very similar to these Satin Nickel Self-Closing Cabinet Hinges
in quality and cost: . I have spray-painted erstwhile hinges and reused them in the past. If your budget allows, I recommend new hinges. They just wait and part so much better. The hinges I link to above run $30 for ten pair. Well worth information technology!
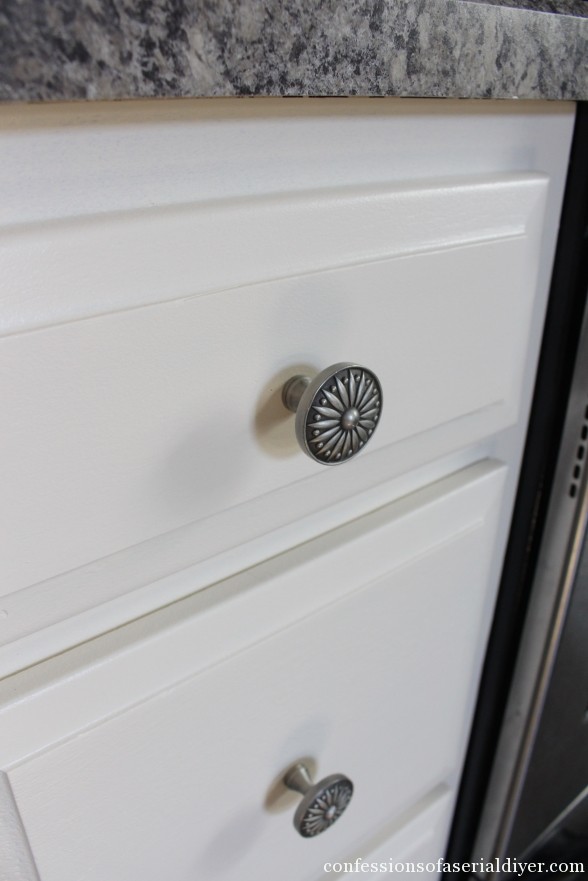
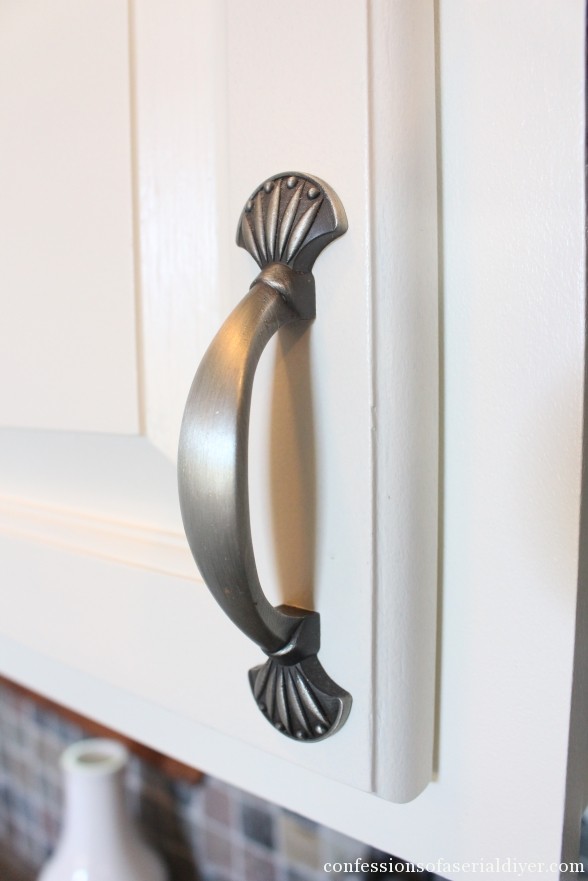
- Add handles and drawer pulls. I reused what nosotros had before, since they are still pretty:
- I as well purchased new Felt Bumpers
for the drawers and cabinets:
If you are but painting, y'all're done! That was a lot of work, wasn't it?
At this point I still had to paint the inside of the cabinet that I planned to add together glass doors to, replace those door panels with glass, add a shelf to a higher place the window, install the crown molding above the cabinets, and add wainscoting to our big island.
Information technology's amazing what a difference pigment tin make! The after photograph below is two years afterward I painted these cabinets and it is nonetheless holding up strong:
Why not use chalk pigment?
I had been putting off this project for style too long. My toughest decision was what kind of paint to utilise. You know I am a huge fan of chalk paint and information technology seemed so much easier with the "no prep" idea behind chalk pigment. However, I chose the latex enamel in the Satin terminate and I could non be happier. The finish is then smooth and the enamel makes it durable and so easy to clean. The prep needed was well worth the end result, and in that location was no need to wax or seal the paint afterward, as would take been needed with chalk paint. That will make affect-ups and so piece of cake. Plus, you lot really want to have a smoothen, grease and grime-free surface to paint on anyway!
I promise that y'all found this helpful! Maybe yous'll be inspired to get started on that kitchen update you've been putting off?
UPDATE: How have my cabinets held up afterward three years??
See for yourself HERE!
You might as well similar:
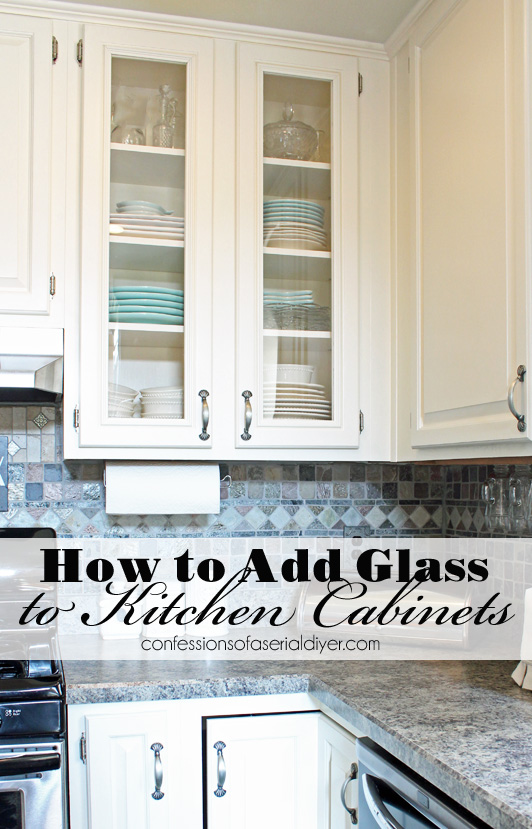
Adding Glass to Cabinet Doors
You might also bask seeing how I painted the kitchen in our new firm using the exact same method, except this required two coats of primer since the cabinets were so nighttime:

See how information technology looks at present Hither!
And here'south what else I paint around here:
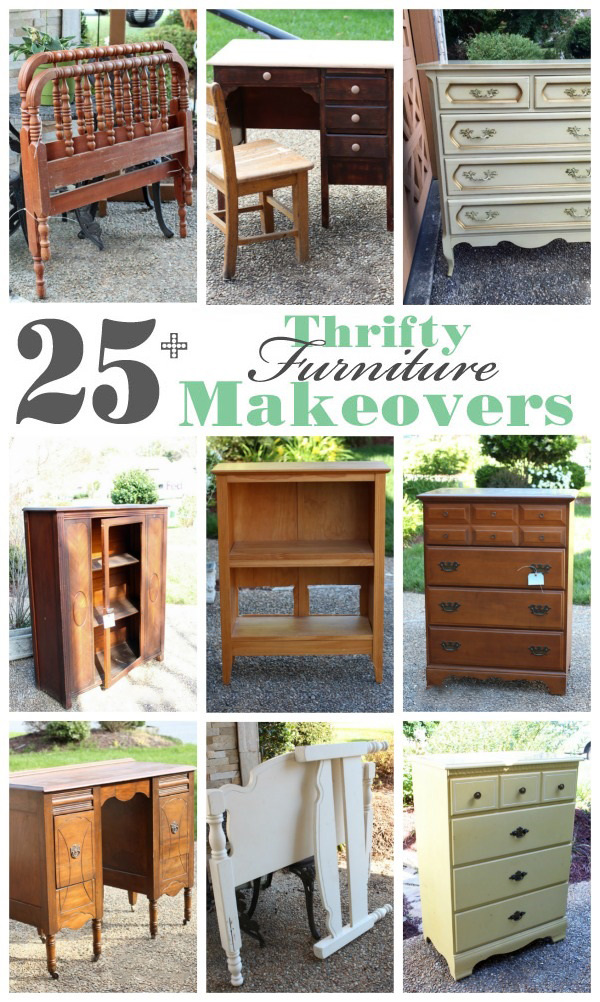 25+ Thrifty Furniture Makeovers
XO,
![]()
Don't Miss a Thing!
If you like what you lot meet, there are several ways to follow along!
Email * Facebook * Pinterest * Twitter * Instagram

Source: https://www.confessionsofaserialdiyer.com/how-to-paint-kitchen-cabinets-a-step-by-step-guide/#:~:text=Only%20one%20coat%20of%20primer,fronts%20of%20the%20cabinet%20doors.
Post a Comment for "Do I Need to Put Primer on Cabneits Again"